
Please click here to learn more about Exports and Mailing Labels in Realist.
The Mailing Labels feature is great way to promote the marketing side of your business. The property Search Results Table is integrated with an Avery mailing label template, so you can go from the Table directly to printing labels for a mass mailing. One valuable use for this is to target neighbors when you’ve made a sale in a neighborhood. Run a search to find all houses in that neighborhood (or draw it on the Map), and then generate labels and send a mailing promoting your proven success in selling in their area.
To Create Mailing Labels
- Run a search to find the properties for which you want to print mailing labels.
- On the Search Results Table, make sure all the properties you want to include are selected
- Click on Create Labels option at the bottom of the Search Results Table
- The Labels window opens:
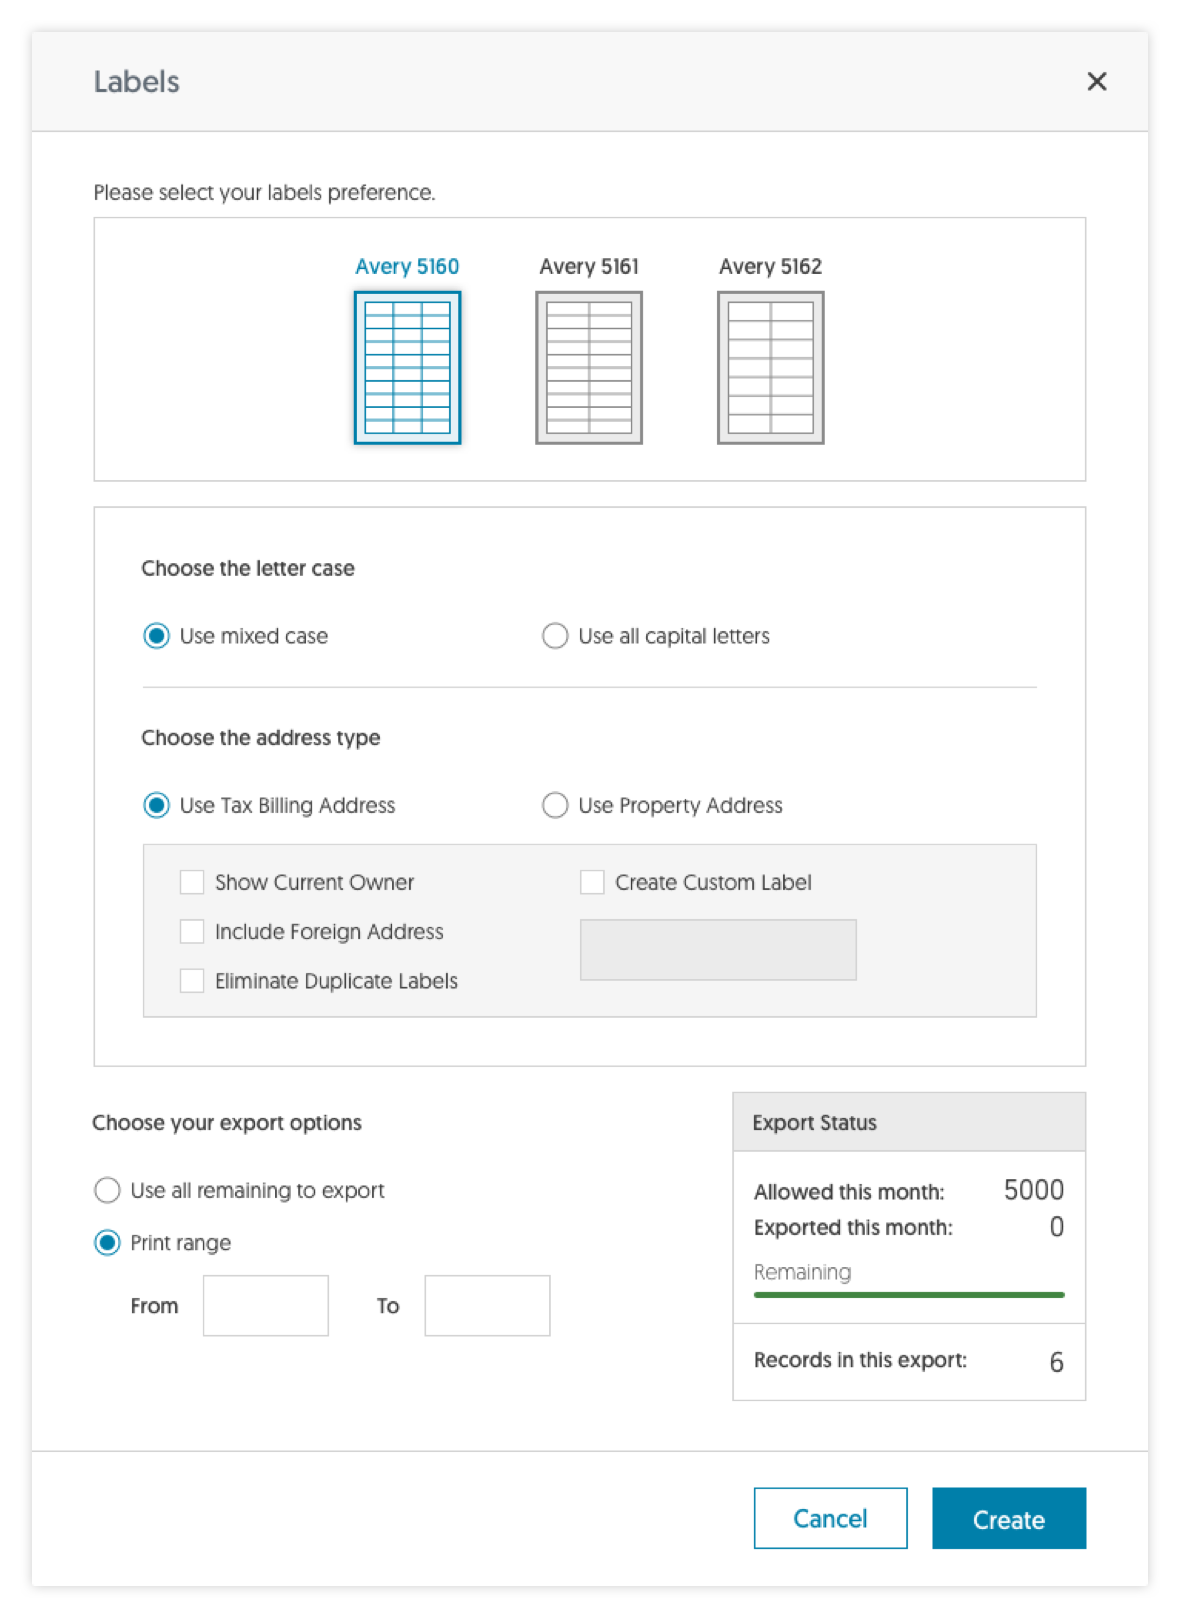
- Select the type of Avery label you will be using. Note that Avery 5161 and 5162 support the use of USPS Bar Codes. If you’d like to include the bar code, select the check box beneath the type of label you are using.
- Select whether you’d like to use Mixed Case or All Capital Letters in the labels.
- Select whether to use the Tax Billing address or the Property address. For example, if you are mailing to locate property owners in a rental area of condominiums, you’d likely want to use the Tax Billing address so the mailing goes to the property owner rather than the renter.
- TIPS:
- Select Create Custom Label to add “or Current Resident” and other greetings to the mailing address.
- Select Eliminate Duplicate Labels to ensure that owners for multiple properties in your search are exported once.
- TIPS:
- Review your Export Status to ensure you will have enough remaining exports to cover the labels. If not, you can use up your remaining exports. Click the Use all remaining to export a portion of the records check box.
- Select Print Range if you would like to create labels for a subset of your search results you may enter the starting row number and the ending row number (range) to include these in the labels.
- When you've reviewed all the settings click Create. This will produce a .RTF file that you can then open in Word (or most any other word processor) where you can add finishing touches like centering or modifying the names before it's sent to the printer.
- Add the Avery labels to your printer and print the .RTF file.
Comments
0 comments
Please sign in to leave a comment.